Showing posts with label Crafts. Show all posts
Saturday, March 24, 2012
Art Portfolios
We have so many pieces of art around and with each Season and each Holiday we add more. The other day we went to the store early in the morning and bought two pieces of poster board. We folded each one in half and decorated them.
I had a leather strap that I picked up awhile ago at the resource center, We made handles with that and used duck tape to hold them on. They came our great and now we have a great place for all the extra art work.
Monday, March 5, 2012
Eyes on the wall!
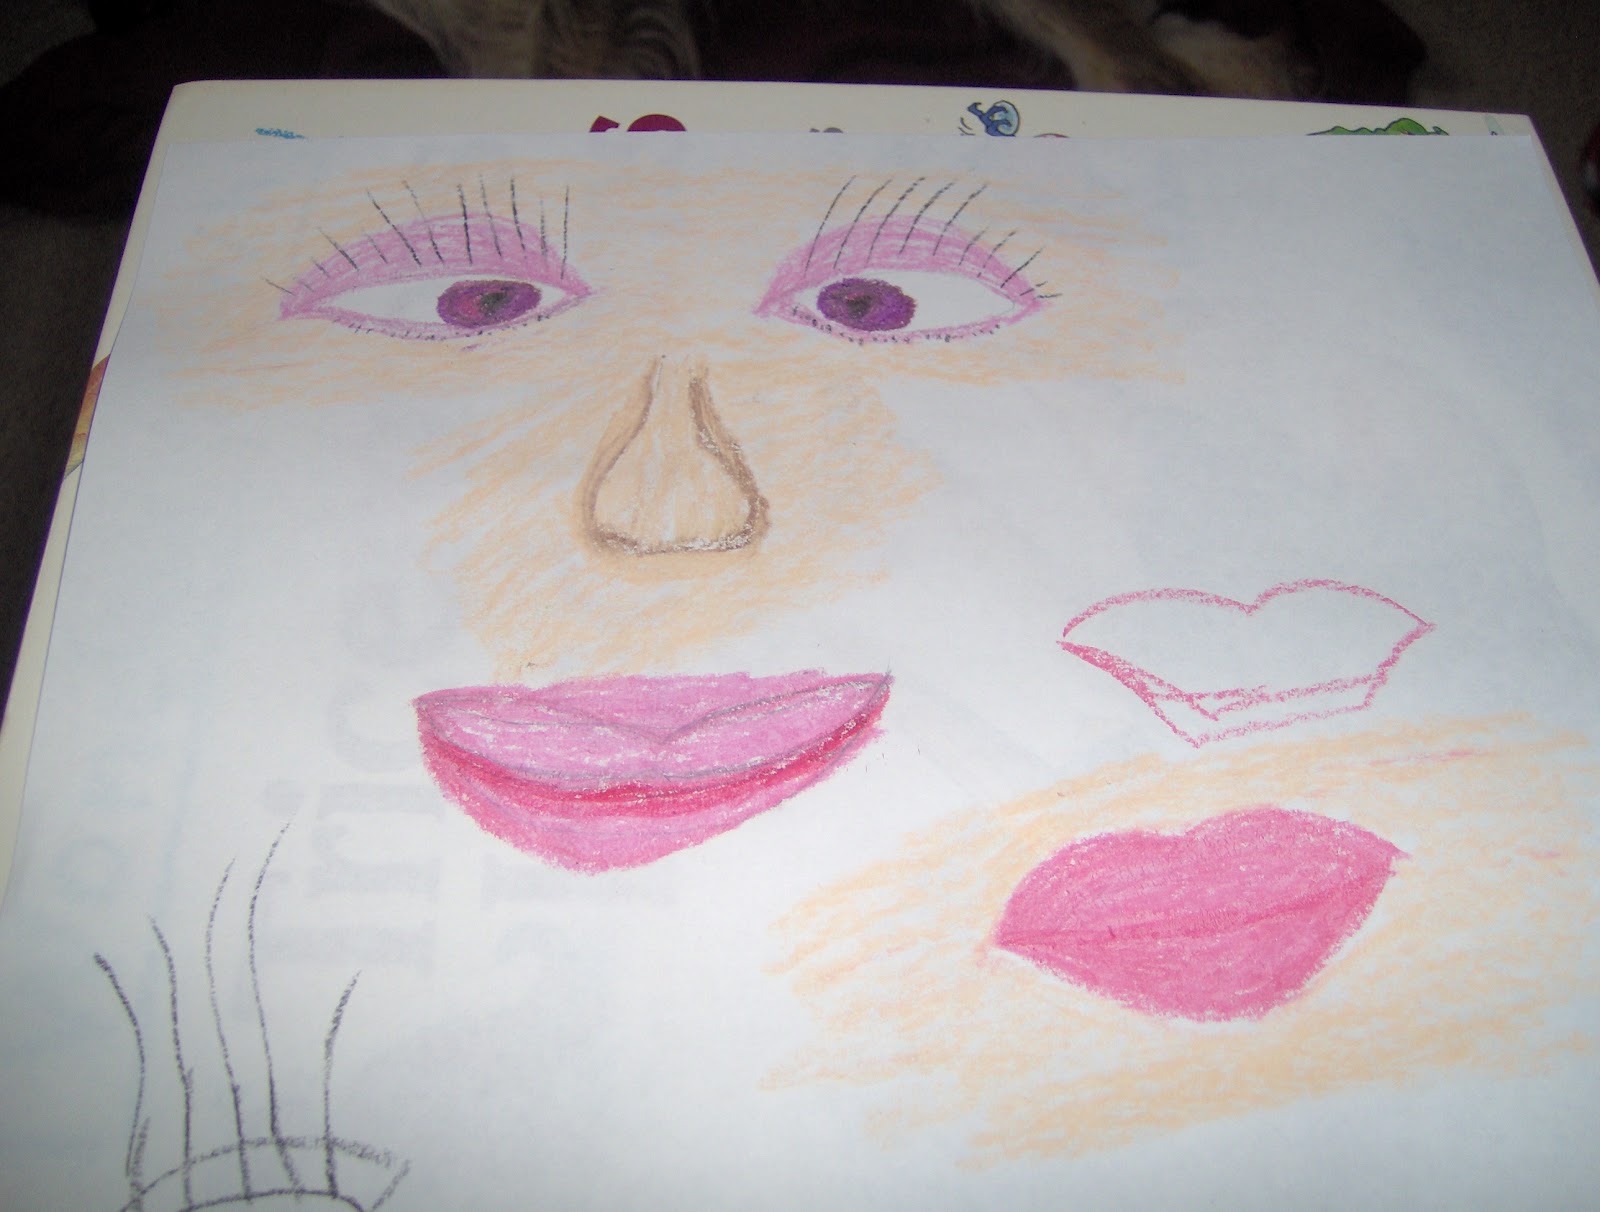
We were experimenting with oil pastels and began drawing eyes. We decided to cut the different eyes up, and do the nose and the mouth. Then we taped them up on the wall. I was trying for a pleasant fairy face but mine ended up looking very creepy.
| face parts all cut un seperate pieces |
| what it looked like on paper |
| what it looks like on the wall |
| Creepy face on door! This one would be great for Halloween |
Thursday, February 16, 2012
A quick post
I haves been slacking this week on my blog. I do miss it and all the lovely comments and encouragement. Within the last 3 weeks I found needle felting. I have never done it before and wanted to try it. I have been lost in the world of needle felting ever since. I just can't seem to stop. I also have lots of other crafts going on. We are making our children's nature bags, wooden buttons, garden markers inspired by the magic onions walking sticks, and wool dryer balls. We don't sell on Etsy or anything, we are just making them and hope to maybe sell some at some local events in the future. Plus I have a birthday party to plan for on Sunday. Vacation from blogging this week had to happen. Enjoy
Wednesday, February 8, 2012
Homemade Chalk Pastels
I checked the craft stores and online to find some Chalk Pastels. They are quite expensive for what you get so I decided to look for ways of making them ourselves. It would also be an exciting experiment. I found some information online about making pastels using oatmeal water as the binder. hmmmm.....
The recipe that we tried was to boil 1/4 cup of rolled oats and 1 liter of water. Strain Use the water only, it is the binder.
Mix 1/2 cup talc powder (unscented, this is the filler) with 2 Tablespoons of powdered tempera paint (This is the pigment). I had a hard time finding this but it can be ordered online. This powder mixed with water makes the liquid paint so it can be used for that as well.
Add tablespoons of the oatmeal water and mix to the consistancy of clay but not sticky. Roll it out onto newspaper into shapes like crayons. Cut the lengths that you want and let dry for twenty four hours.
Now we did adjust our recipe a little.. We did blue first and it was too crumbly so with the next batch I used a little more oatmeal because the binder was too week. After you have your color, you can add a little white pigment to make it a lighter shade. We had fun with this and when It dries we hope that it works. We will update with a later post.
****UPDATE****
Some colors came out more crumbly than others and some were not very smooth. All were usable. I think perfecting the recipe would work, stronger binder etc. Fun project, great for the kids and ends with art supplies. I am not complaining.
The recipe that we tried was to boil 1/4 cup of rolled oats and 1 liter of water. Strain Use the water only, it is the binder.
Mix 1/2 cup talc powder (unscented, this is the filler) with 2 Tablespoons of powdered tempera paint (This is the pigment). I had a hard time finding this but it can be ordered online. This powder mixed with water makes the liquid paint so it can be used for that as well.
Add tablespoons of the oatmeal water and mix to the consistancy of clay but not sticky. Roll it out onto newspaper into shapes like crayons. Cut the lengths that you want and let dry for twenty four hours.
Now we did adjust our recipe a little.. We did blue first and it was too crumbly so with the next batch I used a little more oatmeal because the binder was too week. After you have your color, you can add a little white pigment to make it a lighter shade. We had fun with this and when It dries we hope that it works. We will update with a later post.
****UPDATE****
Some colors came out more crumbly than others and some were not very smooth. All were usable. I think perfecting the recipe would work, stronger binder etc. Fun project, great for the kids and ends with art supplies. I am not complaining.
| Mixing the filler with the pigment. |
| Rolling out the shapes. |
| We did slightly different shades for the blue. |
Tuesday, January 31, 2012
Map Making
We made treasure maps. This was a great project for the kids and easy. The hardest part was waiting for the first step to dry.
1 1/2 Cup Coarse salt ( CG and SA used pickling salt, and I used the salt and sand mix that we use on the driveway. I wanted the stones in it.)
1 Cup flour
1 1/2 cup water
Mix the salt and flour then add the water to your desired thickness. Paint it on the cardboard and then let sit for two days to dry.
| Any cardboard will work, we cut up a box. |
| mix the flour salt and water |
| Leave it to dry. The thicker areas will take longer. |
| She had a plan from the beginning and was ready. |
| We discussed and looked at pictures online of other maps versus landscapes. |
The edges of the board are frayed and jagged making it look like an old map.
Enjoy!
Friday, January 6, 2012
Wizard Wands
I for some reason have been wanting to make Wizard Wands for a while. Today I again asked CG and SA if they wanted to make one and they replied....No.
So I decided to make myself one anyway. I gathered all my supplies. I used beads, a pipe cleaner, a wooden dowel and a rock. Of course I also needed my glue gun, paint and a paint brush. If I had been more prepared I would have gathered some items outside like little pebbles, acorns, wooden vines, sticks etc.
To make one simply pick out the size stick that you want, add your pebbles, rocks, wire, vines, whatever you are using for your design. Then cover it all with paint, I used acrylic. Place it on wax paper to dry, I think that it could use two or three coats of paint depending on what color you choose.
Two little children changed their minds and decided they wanted to make one too. Wow, who knew that would happen? While they were making theirs I noticed that if you just cover the end with colored beads and paint the stick you will have a Fairy Wand. I am sure I will be hearing spells this weekend.
So I decided to make myself one anyway. I gathered all my supplies. I used beads, a pipe cleaner, a wooden dowel and a rock. Of course I also needed my glue gun, paint and a paint brush. If I had been more prepared I would have gathered some items outside like little pebbles, acorns, wooden vines, sticks etc.
To make one simply pick out the size stick that you want, add your pebbles, rocks, wire, vines, whatever you are using for your design. Then cover it all with paint, I used acrylic. Place it on wax paper to dry, I think that it could use two or three coats of paint depending on what color you choose.
Two little children changed their minds and decided they wanted to make one too. Wow, who knew that would happen? While they were making theirs I noticed that if you just cover the end with colored beads and paint the stick you will have a Fairy Wand. I am sure I will be hearing spells this weekend.
| Here is my Black one. |
![]() |
| He was very happy with how it was beginning to look. |
| All three completed, and an afternoon of fun! |
Monday, December 26, 2011
The Season of Giving.
We had a beautiful Christmas, family and friend visits, homemade goodies and lots of fun. The only thing that was missing was a lot of snow. We were able to make a gingerbread house this year. Our forst one!! YEAH. We had lots of fun making it and eating it. Christmas morning brought lots of mess and come evening I was taking down the tree. Usually I keep it up for another few days but space in my house is getting tighter and with all the new toys and games we needed the spot that the tree had made home. I find myself looking through seed catalogs and planning my garden. Is that strange or what?
| CG singing with her new mic and stand. |
| Our first ever gingerbread house |
| 2 more felted sweater nature bags. |
| My felted sweater slippers for a special niece. |
| Bags and baskets of homemade gifts for friends and family. |
Saturday, December 10, 2011
Soap!!!!
We made some soap using a base. I love the oatmeal glycerin soap base, we have tried others and we don't like them. We melt the base saop and add the fragrances that we want. It is fun to try different soaps. We have made ones that smell like blueberry, popcorn and fresh cut grass. This year we are making a batch of Lily of the Valley, Apple pie, and we also made an experimental batch with Sage and Cinnamon and Rosemary. Try something new right. I created our own mold because I can make whatever shape I want. I saw a candy making television show once and it used corn starch as the mold for the hot liquid candy. When it cools you just scoop it out. I used this idea for the hot soap and it worked. So that is my mold, a pan of corn starch. I just press the shape in the corn starch. I enjoy this it really is a calming time for me.
| This is how the soap comes. We cut out what we want to melt. |
| This is the corn starch mold. I use a pestle to make the shape that I want. You can use a toy or any other shape that you want using this process. |
Wednesday, December 7, 2011
Felting Sweaters
We have been working on a project this week. We took a trip to the Goodwill store and bought a few wool sweaters. We then felted the sweaters, cut them up and designed out Nature Study bags, we will give these out as gifts. Adventure Academy Dad cut up some wooden buttons. This was a very fun project. C.G. and S.A. looked for the wool sweaters at the store. It was like a treasure hunt, when they found one they would say 100% wool!.
| Front of Nature Bags. |
| Back of Nature Bags. |
Friday, November 25, 2011
We made clay
We made air dry clay today, it was very fun.C.G. said she could do it everday. I wanted to make some as well but ran out of salt so I had to pass this time. If it turns out nice I am sure we will be making more.
| 3/4 C flour, 1/2 C salt, 1 1/2 t Alum, 1 1/2 t vegatable oil, mix together add boiling water to desired consistancy (I think it was around 1/2 cup maybe) and mix. Color is optional. |
| SA made blue |
| CG made pink |
| Surprise under the table. |
| After our clay pieces dry I will post pictures. |
Monday, November 14, 2011
Fun with Books and Magazines.
For some reason I find it very interesting to make things out of other objects that are around. So I made this folded book just for fun. My husband asked what is it, my response was I don't know but it would look really good on a Library wall. I also made a bowl out of old magazines. That was very interesting, I am going to make more and change the sizes a little. Keep in mind that these are not perfect, they are the first ones that I have made. I am can only improve from this point on.....right..
Friday, January 21, 2011
This week.
We have been busy. Lots of arts and crafts. The kids are learning to sew and have been excited about it.

Subscribe to:
Posts (Atom)